


Airless painting
Airless spraying is the fastest and most versatile way to achieve professional painting results. In fact, using an airless machine is up to 10 times faster than using a brush and at least four times faster than a roller!
Airless spraying achieves this speed by atomizing or breaking the liquid into small droplets without using compressed air. Instead, the liquid is pumped under high pressure through a nozzle. The liquid exits the tip as a high-velocity solid stream – but as this stream exits the nozzle, it breaks up – and the liquid breaks up into very small droplets that form the spray pattern.
If you've ever put your finger on the end of a flowing garden hose, you've created a very simple form of airless spraying.
A very important part of airless painting is preparation. Bonding with nylons and tape is very important in airless painting. The tapes should have more adhesive on them as the application of painting is high and very often the tapes will peel off and stick to the freshly painted part of the surface. The base must be perfectly prepared, because every unevenness is visible. In airless painting, the paint layer is evenly distributed and in this way maximum smoothness of the surface is obtained, similar to painting a car. Whereas with roller painting it is very difficult to achieve such smoothness because roller painting leaves minimal relief on the surface.


Painting
The need for painting services is continuous. Moreover, painting walls and ceilings is most common when making renovations, whether partial or major.
Proven and highly qualified specialists work in this field, who have the necessary knowledge, supported by an English certificate, to do quality painting. Thanks to the huge number of professional tools such as (Hamilton and Purdy) and especially paints, any wall, floor, ceiling, door, metal railing or kitchen can change its appearance in a short time.
Our team of professionals also has extensive experience in airless painting. Proof of this is the 250 apartments painted in various locations in London only in the last 1 year.


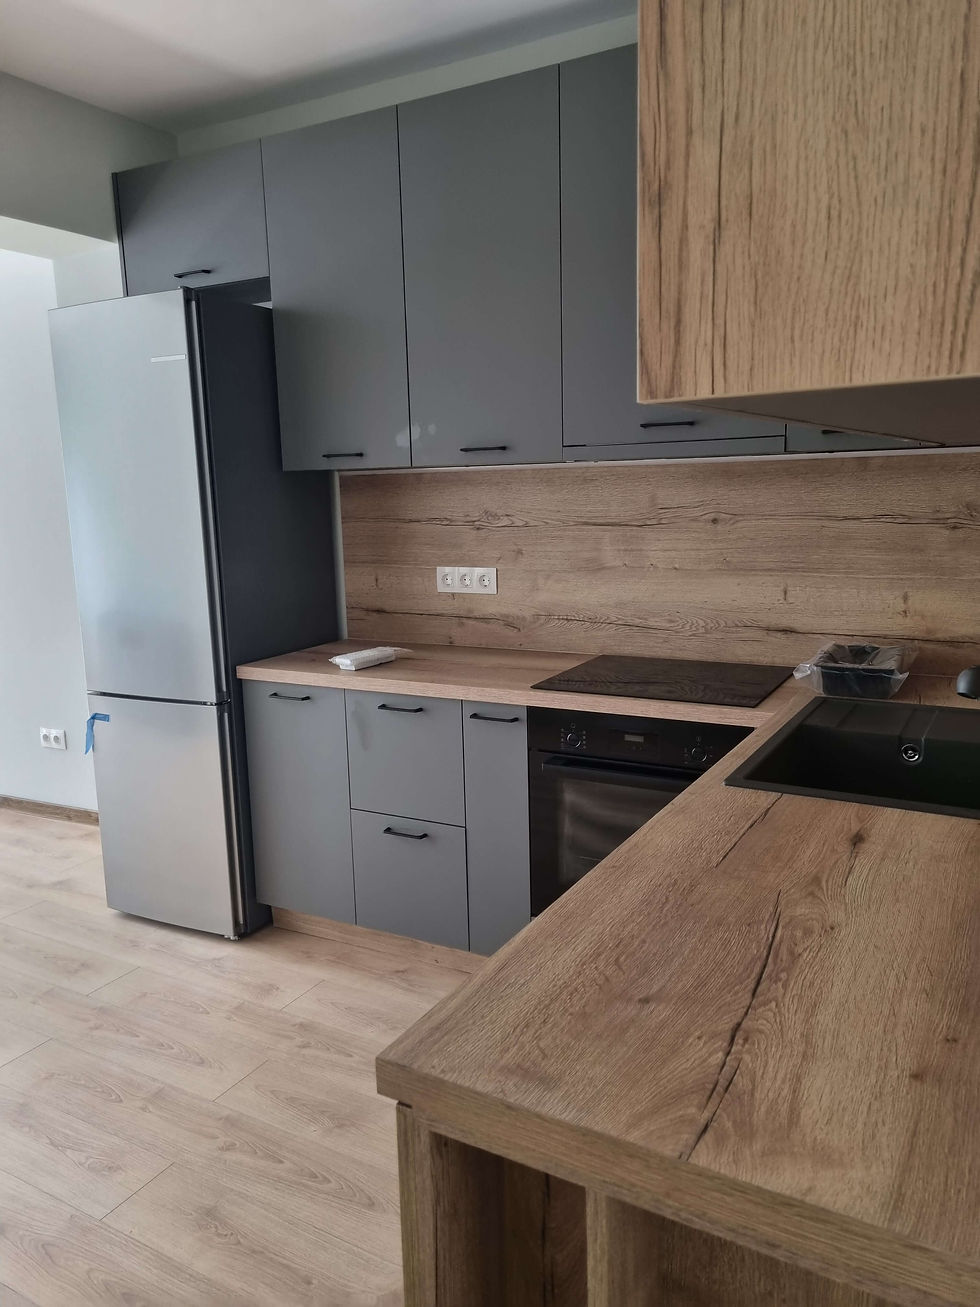
Kitchen Cabinet Painting
Painting an old kitchen involves several important stages: disassembly, cleaning, sanding, priming, painting, and reassembly. Proper preparation and following the correct sequence are essential for achieving a durable, long-lasting finish.
1. Disassembly and Preparation
Remove the cabinet doors and drawer fronts, and take off the handles and hinges. If necessary, fill old holes with wood filler. Protect countertops, floors, and appliances with plastic sheeting and masking tape.
2. Cleaning and Degreasing
Thoroughly clean all surfaces with warm water and a strong degreaser. Rinse with clean water and dry thoroughly. Removing grease and residue is essential for ensuring good paint adhesion.
3. Sanding
Scuff the surfaces with fine-grit P180–P220 sandpaper. There is no need to remove the existing finish completely – the goal is to remove the gloss and create a suitable surface for the new paint. Remove all dust after sanding.
4. Priming
Apply a bonding primer designed for difficult and non-porous surfaces. This provides better adhesion and improves the durability of the new coating.
5. Painting
Use high-quality furniture paint and a small foam or velour roller. Apply 2–3 thin coats, allowing the recommended drying time between coats.
6. Finishing and Reassembly
If necessary, apply a protective clear coat. Allow the paint to cure for 24–48 hours before reinstalling the hardware and cabinet doors.

Plastering
Plastering walls and ceilings is one of the most important parts of a renovation. It is actually the preparation before painting. In order to achieve the best possible results, Avedisyan Eood relies on high-quality brand tools (Refina and Ox). Perfect results are quickly achieved with them.
In recent times, construction plaster has been more and more efficiently replaced by gypsum adhesives and finishing putty, which are many times more effective.
Perfect smoothing is the main goal of plastering, but in order to get such results, it is necessary first of all to carry out quality preparation of the wall. In the event that plastering is performed directly on aerated concrete masonry, it must be built in accordance with the permissible standards. It is recommended to prime the base to avoid subsequent problems such as swelling or peeling.


Tiles
The process of gluing tiles involves a lot of concentration during work. The pace should be slow and precise to get the expected and desired results. Haste is often at the root of mistakes and, accordingly, many problems. It is essential to rely on high-quality adhesives.
We rely on tile leveling systems because they achieve the best possible results and speed at the same time.
Regarding whether to glue faience or terracotta tiles, the differences are minimal and you can act calmly with both options. The chosen terracotta must not slip and at the same time guarantee reliable protection against external phenomena - for example moisture and dirt.


Plasterboard
The product is gaining more and more popularity and has already been established as an indispensable part in the field of modern construction. In addition to everything else, it is environmentally friendly. The material's physical and hygienic properties make it the ideal solution for all residential and administrative buildings.
Plasterboard is used in more than 95% of new construction in England.
Its energy-saving qualities along with its excellent soundproofing characteristics and fire resistance make it widely preferred.

Electrical installation
The installation of the electrical installation is one of the first steps when starting a repair. It can also go hand in hand with the plumbing installation, because both are related to cutting, drilling and drawing of the room.
Its planning and construction is done immediately after the rough construction or demolition of old premises. It also needs to be built with a certain professionalism by experienced electricians to calculate the network load and the number of circuit breakers and RCDs to be installed.

Plumbing (Water and Sewerage)
Very often, when moving into a home, a major repair is required, which also includes the replacement of the water and sewage pipes, because they are outdated, the pipes have accumulated overlays over the years and do not meet modern technical standards. As a rule, the first thing to do is to design anew the water supply and sewerage if we want to change the distribution of the already existing water supply.
A very important part, mainly in old construction, is to make the necessary revisions of the dirty channel when it has a stone pipe. This eases, and prevents breakage, during the subsequent shifts from the lower and upper floors of the cooperative.


Laminate
Laminate flooring is one of the most common floorings in new construction due to its low cost and naturalness. It is characterized by easy maintenance, safety, easy installation, durability over time.
A flat base is very important when installing laminate flooring. The main floor must be level and clean. the presence of garbage under the slats can lead to the loosening of the locking systems, violating the integrity of the floor.


Clearing
Cleaning is the final part of a repair. It is extremely important that the people doing it do it professionally and have experience.
It is very important to use professional preparations that are gentle on the floor surfaces, windows and tiles in the bathroom. While some places require specific equipment and large machines, other places require simple but essential accessories – towels, buckets, vacuum cleaners, scrapers, etc.


Reversing windows
The so-called window reversal is a process that takes place after installing window frames in our home. Wrapping windows with plasterboard is the most common method for interior window frames. The first and most important process is priming.
After its drying, plasterboard strips are glued and leveled. The next step is: gluing externally galvanized corners that do not rust. Gluing fiberglass tape is a must to prevent cracks. The final step is plastering.


Staircase construction
The construction and installation of a staircase is a complex process that combines engineering design, calculations, precise fabrication of the steps, and professional installation to ensure safety, functionality, and aesthetics in the home.
The hollow structural section provides exceptional resistance to twisting and sagging. The metal must be precisely welded, primed, and painted to protect it against corrosion and ensure a good appearance.
All sharp edges must be properly treated and chamfered on all sides. This not only reduces the risk of injury in the event of impact but also protects the wood itself from chipping and damage to the edges during everyday use.
It is important that the steps are properly prepared and protected with suitable products such as stains, oils, and waxes, depending on the desired final effect and the level of wear they will be exposed to.
The most important stage is the sealing and final protective treatment. To ensure that the steps are resistant to scratches, dents, and everyday wear, they should be treated with a high-quality, hard-wearing parquet finish – either water-based or polyurethane.
Another option is to use oils and waxes, which enhance the natural grain and beauty of the wood while providing the necessary protection. The choice of finishing system depends on the type of wood, the level of use, and the desired visual effect.


Fireplace Installation
The first and most important stage is inspecting the chimney and checking that there is sufficient draft.
The next step is connecting the flue pipe to the fireplace outlet using the shortest possible and properly designed route, without reducing the required cross-sectional area.
Insulation materials are then installed. Heated components must not come into contact with wood, drywall, or other combustible materials.
Before normal operation, the draft, the tightness of the connections, and the proper evacuation of flue gases must be checked. In well-sealed rooms, a separate supply of fresh air from outside may be required.


Waterproofing Installation
The installation of waterproofing depends entirely on the type of project (roof, bathroom, foundations) and the material being used. Proper surface preparation and following the correct application procedures are critical to preventing leaks and ensuring the long-term durability of the coating.
The surface must be perfectly clean, dry, dust-free, and free of grease or oil stains. All cracks must be filled and repaired beforehand.
A suitable bitumen-based or polymer-based primer is applied to ensure proper adhesion between the waterproofing material and the surface.
First, critical areas such as corners, drains, and pipes are treated. A special waterproofing tape or sealing collar must be embedded in these areas. The material is applied with a roller, brush, or machine in several coats. Each subsequent coat should only be applied once the previous one has completely dried, in accordance with the manufacturer's instructions.


Bathroom Renovation
The proper approach to a complete bathroom renovation requires strict adherence to a specific sequence of construction stages to ensure durability and protection against moisture. Any compromise in the sequence or quality of materials can lead to hidden leaks and costly repairs later on. The first stage of the renovation is removing the sanitary fixtures and tiles down to a solid substrate.
The next step is replacing and installing the new plumbing system. In panel-block apartments, overlapping connections are used where necessary. Access panels are provided to allow easy access when replacing a riser or water meter, so that if the riser needs to be replaced by the neighbours, the newly renovated bathroom does not have to be demolished. Providing an inspection opening or access from the neighbouring property ensures that any potential problem with the connection can be repaired without breaking up the newly finished surfaces. The electrical installation is also replaced or relocated where necessary.
After these stages, the surfaces are primed and the walls are levelled, followed by the construction of boxing and enclosures using moisture-resistant green drywall. Once the cement screed has been applied to the floor and the required slopes have been created, waterproofing is installed. After applying primer, waterproofing tapes are carefully installed in the corners, followed by two coats of waterproofing. Once the waterproofing has dried, the floor and wall tiles are installed.
The next step is grouting and applying silicone sealant. Silicone must be applied to the joints where drywall meets the wall, as drywall structures are subject to linear expansion and contraction. Without a flexible joint, these areas may crack over time. Finally, a drywall ceiling is constructed and the new sanitary fixtures are installed.


External Insulation
Choosing EPS (expanded polystyrene) for external insulation is an excellent and economically efficient solution for the most common types of construction in our country. It has very good vapour permeability (a “breathable” structure), which reduces the risk of condensation inside the building, while also providing excellent thermal insulation properties.
For an EPS insulation system to remain durable and perform properly over the years, the following key technical requirements must be followed:
EPS Adhesive: It is recommended to use a specialised EPS adhesive (cement-based with polymer additives). Winter formulations should be used during periods of low temperatures in late autumn.
“Frame and Dots” Method: The adhesive is applied as a continuous strip around the entire perimeter of the board, together with 3–4 dabs in the centre. Never install EPS boards using adhesive only in isolated spots. If gaps larger than 2 mm remain between the boards, they should not be filled with adhesive, as this can create a thermal bridge. Instead, they should be filled with pieces of EPS or with specialised polyurethane foam applied using a foam gun.
For mechanically fixing EPS, anchors with either plastic or metal nails are used. Their length is calculated as follows: EPS thickness + existing plaster thickness + a minimum of 5–6 cm anchorage into the concrete or brickwork. The anchors should be slightly recessed into the boards and sealed with adhesive or special EPS caps.
Fibreglass mesh is embedded in a layer of adhesive-reinforced render (minimum class C2 or a specialised thermal insulation product), with the strips overlapping by at least 10 cm.
For the final finish, facade render is used, typically silicone or silicate-based. Avoid excessively dark colours for the final coating, as they absorb more solar radiation, causing the boards to heat up to over 70°C and potentially deform.

